

Harvesting Elderberries
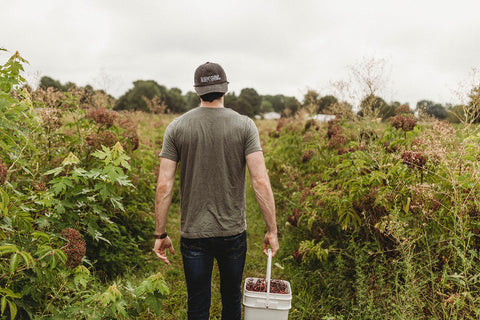
At Norm’s Farms, we’re hot and heavy into the harvest season, cleaning, processing and freezing our American elderberries. Elderberries ripen quickly and virtually all at once; they go from green to dark purple in just a period of weeks. That means from about mid-July to mid-August every year, it’s all-hands-on-deck. And since our fields and greenhouses got a little bit bigger in 2020, so did our full-time and seasonal farm team.
Elderberries are an exceptionally perishable fruit, which is why you never find them fresh at the farmer's market or at your local grocery store. When it’s go-time, we have less than 12 hours to process our picked berries. After processing, we store them in freezers until we’re ready to cook and make them into Elderberry Extract, Wellness Syrup and other Norm’s Farms products you know and love.
The 2020 season looked a bit different, what with implementing social distancing rules, temperature checks and other precautions, but it was really nice to get our hands dirty again. After all, farming is at the root of everything we do!
How to Harvest Elderberries at Home
So, you’ve got an itch to try growing your own elderberry. It’s good to note that while a small crop of elderberries may be produced in the plant’s first year, the most productive harvest time for elderberries will be after the plant matures, often in its third year after planting.
That’s because elderberries send up a bunch of new canes each year. The canes attain their full height within the first season and develop lateral branches in the seasons after. Flowers (and later fruit) are developed on the tips of the new growth, especially on the laterals. So, your matured elderberry canes are the most fruitful.
Equipment for Picking
If you’re ready to harvest your own elderberries, make sure to have the following tools handy:
- Garden shears
- Shallow box or collection container
- Cleaning bucket
- Gloves (optional)
How to Pick Elderberries
Tip: Elderberries don’t store well, so only pick on days when you have time to process and use or preserve them ASAP.
- When you find a cluster that’s ripe, support the berries gently with one hand. With the other, use your shears to cut the main stem about an inch or so above the cluster. (You can crush one or two berries between your fingers to check for ripeness. Harvest the berries when they are almost black, crush easily and the juice is red.)
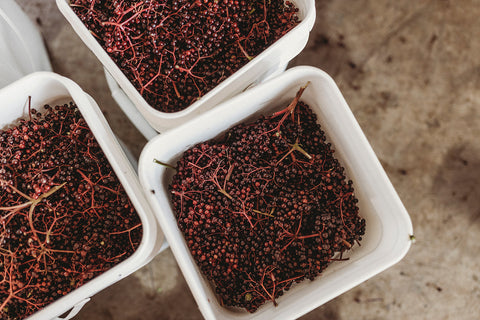
- As you harvest, lay each cluster in a shallow box or collecting container. Be sure not to squish the berries down into your container. Just let them gently rest on top of one another as you go, until the container is full or until you’ve finished harvesting for the day.
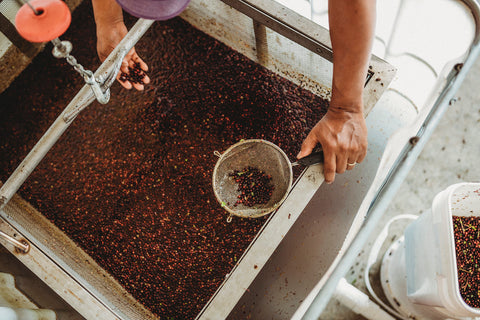
- Strip the ripe berries from each fruit cluster and place them in a bucket filled with water. Discard the stems and any green or underripe elderberries.
- Swirl the berries in the bucket gently with your hand. Skim off the finer stems and unwanted plant material that rises to the surface of the water. Drain the berries and process or freeze the crop promptly.
Friendly Reminder: Friendly Reminder: Elderberries require careful processing before consumption; as astringent, raw berries can cause upset stomach and illness. But when harvested and prepared correctly, elderberries are safe to eat and offer loads of immune boosting benefits. Use your seedless, cooked berries in desserts, sauces, or jams, or try our pure Elderberry Extract to skip the fuss.